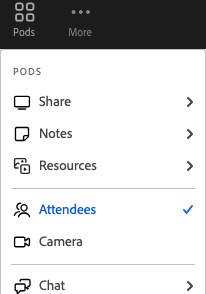
Step 1. In your Adobe Connect classroom click the 'Pods' icon on the Adobe Connect screen.

Step 2. Make sure the 'Attendees' pod is selected to be displayed in the current layout. Please click to display it if it is not displaying.
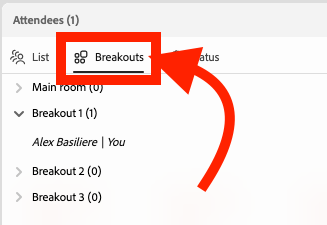
Step 3. Choose the 'Breakouts' option on the 'Attendees' pod
Step 4 (Optional). If you want to copy the 'Main room' be sure to delete the current breakout rooms that do not represent the contents of the 'Main room'
You can do this by hovering over the breakout room and clicking the 'x'

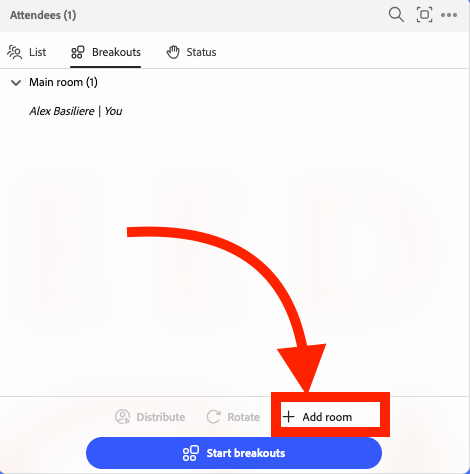
Step 5. Make sure all the needed content is loaded and displaying in to the 'Main room' before you create the new rooms.
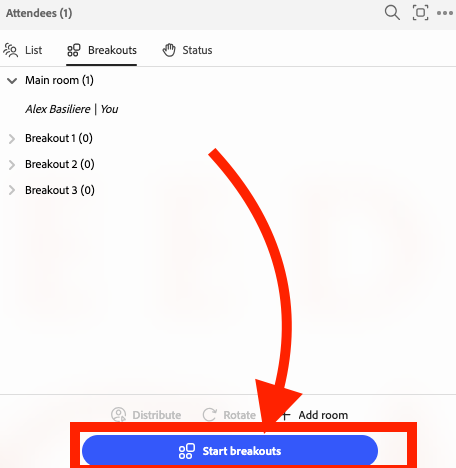
Step 6. You can click the '+ Add room' button at the bottom of the 'Attendees' pod to add a breakout room.
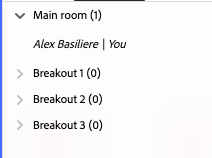
Step 7. Add how many breakout rooms you would like to distribute the students to.
Step 8. Then click 'Start breakouts'
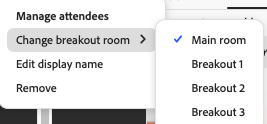
Step 9. (Optional) Please click your name in the 'Attendees' screen and hover over 'Change breakout room' and choose one or many of your breakout rooms. You can see now that all the breakout rooms are set up the same as the 'Main room' with the exception they have their own versions of the pods.
See its the name of the pod from the 'Main room' ending with the '- Breakout' and the number
Example:

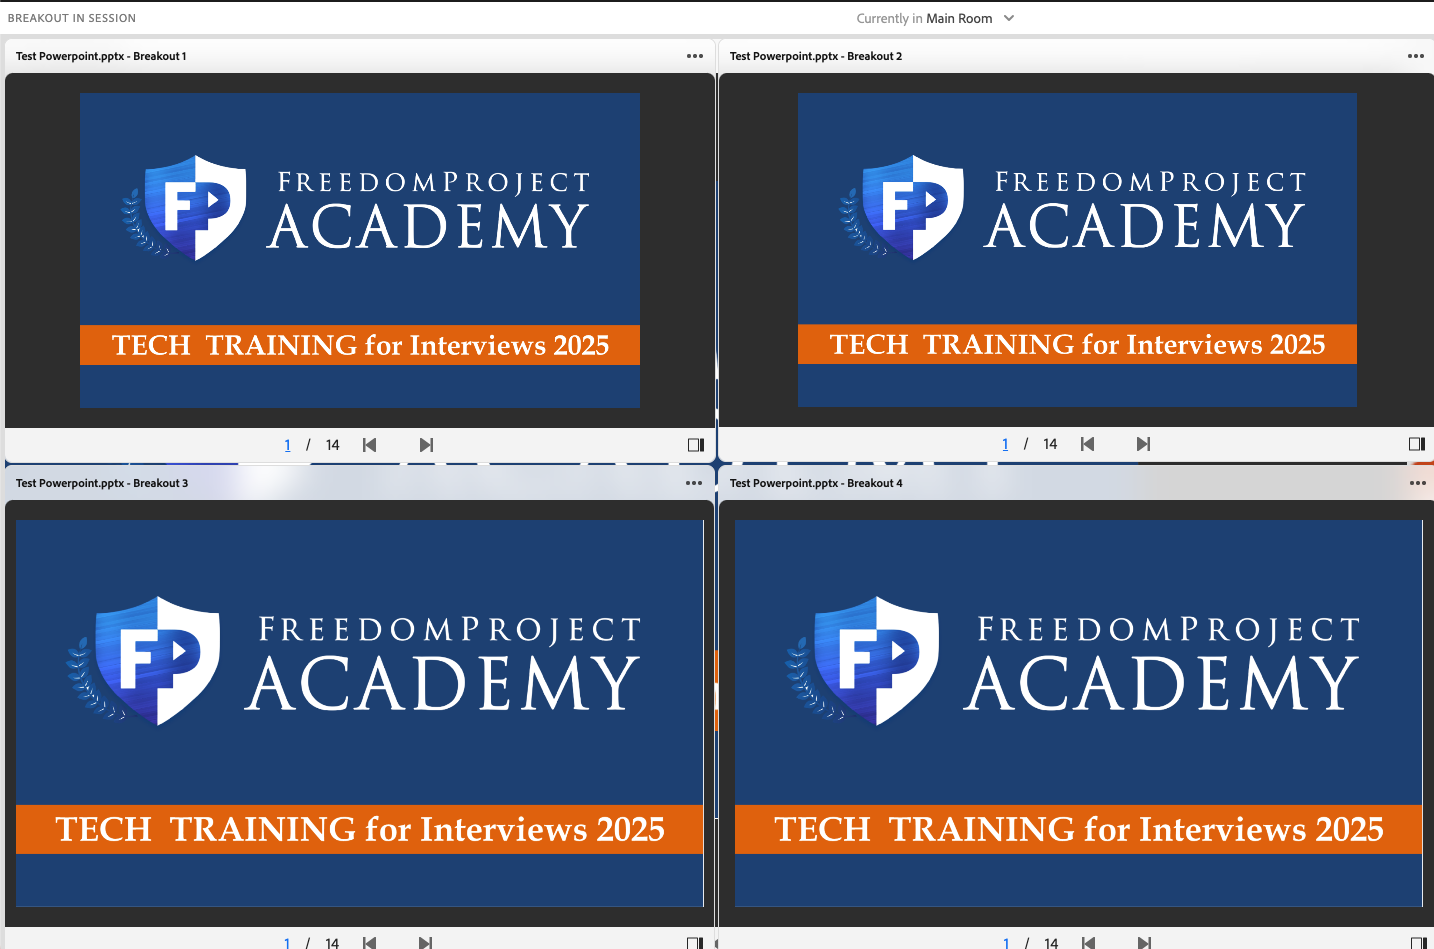
Step 10. (Optional) if you want to view all of the breakout rooms from the 'Main room' at once to monitor students progress you can do that by opening all the breakout room pods in the 'Main room' after distributing the students.
Step 11. (Optional) Click 'Pods' > 'Breakout pods' > Hover over each breakout room > Then click the breakout pod you want to see
Here is an example:
Keep in mind if you end the breakout rooms with presentations open in the main room, they will be visible to all students.